How to Make a Terrarium: A Step-by-Step Guide
Building a terrarium is like a science project and a fascinating one at that. You create a mini ecosystem that you can observe through glass as it grows and blossoms – a bit like magic. It’s like creating the perfect mini garden, but beware, it’s addictive. Once you have one, the next will be immediately on your mind.
Terrariums can be big or small, housed in a small glass jar, a kitchen storage jar, or an old fish tank as long as there is some way to close it to create its cycle.
There are so many ways to be creative with plants, rocks, and layers of soil inside the terrarium. They make excellent décor items in the home, requiring very little care once they are established.
What is a Terrarium?

In technical terms, a terrarium comes from the Latin terra for earth or land and arium meaning ‘a place for relating to’, which in this case is a glass container. The name was based on the word aquarium, the name to describe a place for water, fish, and water plants. Vivariums are a place for animals, and a terrarium is a place for plants.
Interestingly, the idea of an enclosed glassed-in ecosystem was discovered by accident by English botanist Nathaniel Bagshaw Ward in 1842. While experimenting with moths in a sealed glass jar, he noticed that the moss and ferns that were included with the moths were thriving in the interior environment.
After experimenting with more plants, he wrote about the discovery in his book ‘On the Growth of Plants in Closely Glazed Cases.’ And so began a way of planting that has fascinated and enthralled many.
How it Works

A closed system holding plants and soil has an ecosystem that starts with a water cycle. The water hydrates the soil, which is then taken up by the plants and released through the leaves, and then condenses on the glass and falls back into the soil.
Plants can last in this closed system for decades. The oldest terrarium is reported to be over 60 years old, started by David Latimer in England in 1960. Only once has the container been opened to add some water.
What You Need to Plant a Terrarium
The bare minimum will get you going, but there are a few things in this list that will make it a big success. Again, beware! You’re about to be addicted to building terrariums.
A Container

A glass jar with a good cork or stopper is ideal. It can be any size, square, round, rectangular, tall, or squat – whatever you choose, but preferably made from strong glass and clear, not colored. Usually, the bottom of the glass container is broad, curving into a narrow entrance, making it easier to secure with a cork or stopper, but not necessarily easy to plant up.
Large containers like fish tanks need secure lids to contain the ecosystem. A large glass cookie jar with a glass stopper and rubber gasket to affix one is ideal for a beginner.
When you are planting up your terrarium, make sure any imperfections or seams are on the sides or towards the back. That way, when you place the terrarium, there is a clear view.
Growing Medium

Any commercial houseplant soil will be okay in a terrarium, but the best method involves mixing it up yourself. Use two parts potting soil with one part rehydrated coco coir or palm peat. You can add some perlite to lighten and enrich the soil, but you will see the white bits in the soil mixture. Leaving that out is an aesthetic choice.
As a rule, a substrate in a terrarium should provide nutrients, hold water, have good aeration, and it should not be able to compress too much, which will smother the roots of plants.
Drainage and Mulch

Add the top and bottom substrates like you would any potting recipe. Use fine gravel and small tumbled stones as the layers on the bottom. Choose something that looks good to you, as you will see the soil layer in the container. For instance, you can opt for different colors of gravel for a contrasting look.
For a mulch, use moss. Sphagnum moss is readily available in nurseries should you not have a handy moss supply in your garden.
Substrate Barriers

In some circumstances, your drainage layer of stones on the base of the terrarium will be big enough so that soil will fall through the gaps. In this case, you can use a substrate barrier that can be cut out to the right size to fit across the layer and still be thin enough not to interfere with the aesthetics of the finished terrarium.
Use something like shade cloth or screen mesh to form a barrier between the soil and the drainage stones. Cut it with a pair of scissors and shape it to fit any sized glass container.
Activated Charcoal

Adding activated charcoal is a trick to keep your terrarium healthy and give it a better chance of survival. This step is not necessary, but it does reduce the chance of rot and eliminates odors and even toxins. It can also store nutrients and moisture that can be released slowly to the plants.
Mix it into the growing medium or add it as a layer under the soil. You can find activated charcoal in a pharmacy or as horticultural charcoal in specialist nurseries.
Tools

A plastic funnel or a sheet of paper rolled into a funnel shape is a must for containers with a narrow opening. A widger or long tweezers are also good tools to have for getting your soil into the container.
You can make your own little tool by stabbing a wine bottle cork with the sharp end of a skewer. This makes a tamping implement that can be used to move soil around and make it all nicely level.
Then, there are specialized terrarium tools with long handles that are very useful for planting in terrariums. You can use your long tweezers that are equally convenient for planting and moving things around. You can always borrow some kitchen tools to do the job as well.
A Selection of Plants

When choosing plants for a terrarium, decide what look you are going for, and choose small enough plants for the space in the container. Remember that the plants will grow in size, so they need a bit of space to grow. The ideal finished terrarium should have at least two-thirds empty space.
As you pick your plants, think about those that will provide different levels in the design to create more interest. Plants all the same size will look boring.
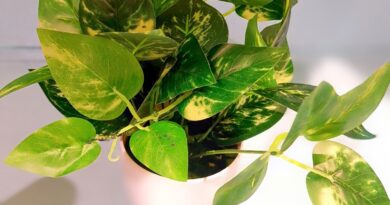
In general terms, select plants that can handle high humidity and low indirect light. Some good candidates are ferns, miniature orchids, pilea, mini palms, peperomias, and polka dot plants.
Decoration

Decorating a terrarium is optional and unnecessary if you choose contrasting plants for the main interest. However, you may want to add some good-looking rocks, colored pebbles, bits of driftwood, slate pieces, shells, beads, or even fairy garden items. A little bit of extra flair never hurt anyone!
Springtails

Calling the cleanup crew! Springtails are little bugs that feed on decomposing matter, fungi, algae, pollen, and bad microorganisms. They prevent mold from taking over and aerate the soil while living off the oxygen the plants provide.
They are available for purchase online. If you feel like getting close to nature, you can go on a hunt for some in your own garden. You can usually find them in moist areas, under decomposing leaves, under rocks, and fallen branches in the shade. Look for white-grey insects measuring about .04 – .07 inches long.
Try trapping a few by finding a suitable spot where they might be hiding. Take a shallow container and bury it in the soil to ground level. Add a damp paper towel, a mushroom, and some leaves, and wait for a day or two. As the mushroom decomposes, the springtails will find their way over, and you can then dig up the container and drop a few of them into your terrarium. Alternatively, you can try watering pieces of wood on top of the ground to lure springtails in. In a day, they will likely gather under the wood, where you can collect them.
Steps to Planting a Terrarium

Step 1: Using the funnel (or rolled-up paper), add a layer of gravel about half an inch thick along the bottom. Use your tools to spread it out so that it’s good and even. Then, add the bigger stone as another layer one half to one inch thick.
Step 2: Add a layer of activated charcoal about a quarter of an inch thick on top of the pebbles. You can choose to mix it into the soil instead.
Step 3: Add a layer of growing medium two to three inches thick and spread it out so that it’s even.
Step 4: Once you have the prep done, place any large rocks, driftwood, or large décor items you may want to use. Then, dig a hole in the soil with a tool, a dowel stick, or skewer. Unpot your plants and tease out the roots, getting as much soil off as you can. Then, place the plant in the hole and press the soil down around it to secure it in place. Repeat with all plants and add décor if you wish.
Step 5: Top the naked soil with moss or use a layer of pebbles – whatever you decide. Check all around the edges and fill in with little bits until it looks finished.
Step 6: Water carefully by using a watering can with a long spout. Do this along the inside of the container all the way around. This prevents any soil from splashing on the sides of the glass and gets the water to the roots of the plants. You can also use a spray bottle with water and spritz the container, but you will have to clean the inside of the glass.
Make sure not to overwater. The soil should be damp but not waterlogged.
Step 7: Clean the glass, both inside and out, before placing it in position with good indirect light.
After Care

It’s important to place your finished terrarium in a spot that gets lots of indirect light and no sunlight, which will dry out the container and burn the delicate plants inside. Leave the stopper on its side on top of the container for the first couple of weeks, allowing air to get in. Once you see that there is no more condensation on the sides of the glass, the stopper can seal the opening for the ecosystem to develop.
Maintenance

Once the ecosystem is stable, there is very little need for any watering, but there may be a need to clean the glass, prune plants, and remove debris.
Trim away any yellowing or browning leaves and stems that could attract molds and harmful microorganisms and unbalance the ecosystem. This will be unnecessary if you have resident springtails.
If condensation builds up again after the first time, remove the stopper and leave it for a week until the condensation is gone before sealing again.
Keep an eye on the plants in the terrarium. They will let you know if they need a bit of extra moisture with symptoms like drooping leaves.
Final thoughts
This living art form can be the start of a wonderful hobby that will also make excellent gifts because they require such little maintenance if done right. I can picture all my pantry storage jars emptied of their culinary product, cleaned, and ready for the next batch of ferns and moss. How creative and fun!