Soil Testing for the Garden: Selecting the Most Appropriate
There are three main principles to follow to get the best soil test data for interpretation
- Know what kind of growing substrate you have
- Know what kind of extraction is needed for your growing substrate
- Think through your sampling technique before sampling and keep notes
Traditionally, there are two different kinds of growing substrate: potting/soilless media and mineral soil.
The base of potting media mostly consists of organic materials like peat, coco, a little bit of humus maybe a dash of compost, and something for aeration/structure—so perhaps vermiculite, perlite or pumice. Sure, it is true that some brands of bagged media will be amended with fertilizers or beneficials or some special sauce, but the main building blocks of potting media are organic materials—peat, coco, humus, compost.
Contrast this with mineral soil. We are stoked if we naturally find 5% organic matter in a mineral soil. Mineral soil is made up of whatever weathered, broken down rocks are present at your location plus the smidge of an organic matter layer that has developed upon its surface. When we are talking about chemistry and soil testing, it is crucial to understand there is a universe of difference between the way an organic particle acts and how a mineral particle acts.

When a soil is tested, it is not just shooting soil through an analysis machine and, poof, you get numbers. There is an important, and often overlooked, extraction step that takes place to pull the nutrients out of the soil. This extract is read by the analytical machine to produce your soil test results. The data you get on your report is really data measured from the extraction process you selected when you ordered your soil test. So, when you are selecting a test for your soil, the most important thing is to select the right extraction method, that way the data is relevant to you.
Let’s do a deep dive on extraction. A soil extraction is basically a chemical slurry that we soak or shake the soil sample in to pull nutrients from the soil into the fluid. Now, knowing we have an organic material-based substrate (potting media) and a mineral-based substrate (mineral soil), which do you think would need a stronger chemical to pull nutrients out? You would be right if you answered the mineral soil.
Mineral soil tests are designed to pull nutrients off a particle surface that is resistant to having molecules pulled from it. Organic materials are more readily digestible because it is plant-based material (versus rock-based material) thus extraction methods for organic materials are designed to be gentler and extract the readily available nutrients in the potting media without over-digesting the organic material.
(Read also: Why Growers are Crazy for Coco Coir)
Extracts for mineral soil testing also change from region to region because soil changes from region to region. Different chemical extraction recipes are better for certain soil properties and soil mineral profiles. For instance, a high pH, arid desert soil in southern California may get an ammonium bicarbonate DTPA extract but a neutral pH, loamy field soil from northern California should get an acetic acid extract. For mineral soils, it is particularly important to use a lab that uses the soil testing method for your type of soil. This often means your local lab will be the most experienced and calibrated to the mineral soils of your region.
What happens if you get the wrong test for potting media? This happens all the time. Producers will opt for the less expensive mineral soil test rather than the more spendy greenhouse media test. Or maybe they just don’t know there is a difference and pick the wrong test. Well, if you get a mineral soil test done on potting media, you will see inflated nutrient values. There is a lot of nitrogen, sulfur, phosphorus etc. bound up in the organic matter matrix and to extract it with an acid or base will give you higher nutrient values then what your crop is experiencing.
This information can be handy, it can help you understand what is in your soil nutrient “savings account” i.e. what can be unlocked through mineralization over the growing cycle, but these data do not help us interpret what your plants need now. When interpreting data, it is important to understand what snapshot it is giving you. These data from deeper extractions on potting media are not inherently wrong, but they are not the whole story either. Data is data, it is up to the person interpreting data to understand its illuminations as well as its limitations.
For immediately available nutrients, you want to mimic what the plant will experience under normal watering conditions. The Saturated Media Extract or SME is a water extract that mimics the nutrient profile your plant is experiencing when it is irrigated. We saturate the soil to see the availability of soluble or readily plant available nutrients in the extracted solution. This is the most appropriate test for potting media as it is most like what your plant is experiencing during a typical irrigation event.

The SME test is hands down the most superior test for potting media or any substrate that is heavily dominated by organic matter. We often see hybridized substrates wherein folks have added potting to native soil, and they wonder which test to get. If your substrate has anything above 12% organic matter, you should be getting a SME test.
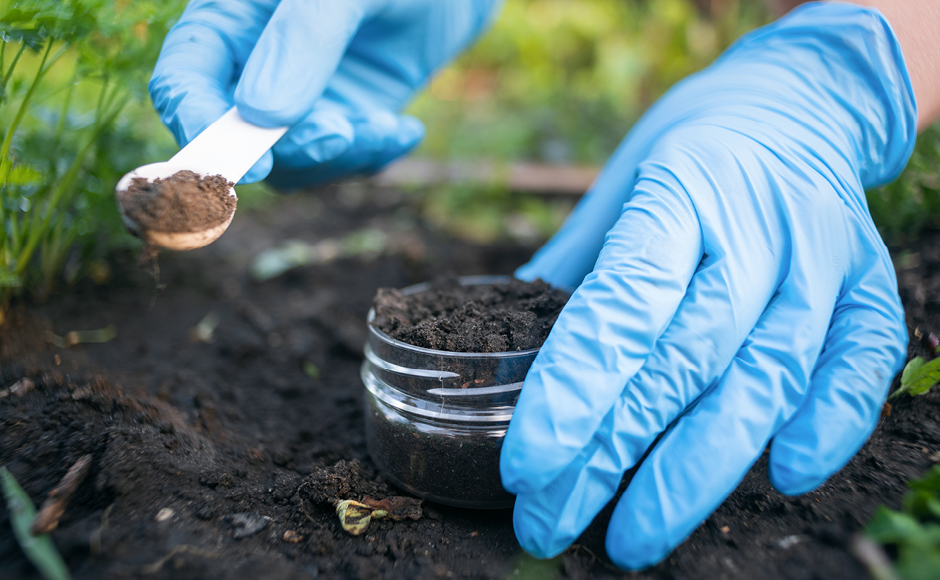
The third and last principle to getting the best soil test data possible is sampling. Sampling technique is nuanced, it is custom to your objectives, it is something to be planned and thought out or else you run the risk of bad data and a wasted test fee. Your test data will only ever be as good as your sampling technique, so do not discount the importance of this step and plan your sampling strategy and technique.
(Read also: Hydroponic Lab Analysis Tests and How to Use Them)
Some basic sampling strategies:
- Keep notes when sampling as they will be key to interpreting your results. Always record what you did and what you observed while doing it. Do not try and remember sampling details. Notes will also inform and improve your sampling strategies for the future.
- Plan to represent the area of interest in a dynamic way. For example, do not sample from just one spot, take soil from many different areas, and mix into a bucket to make one composite/representative sample.
- If you are fertigating or top-dressing amendments, it is important to scrape away the surface layer and sample the soil profile below to avoid potential accumulations and get what we call, surface bias nutrient spikes on your soil test report.
- You can use sampling technique to compare before and after an event or compare different production areas.
- Standardize your sampling technique. Over time you will want to sample the same every time so create a protocol to follow, and you will get more consistent results.
Remember that the power for getting the best data for the garden largely lands in the growers’ hands. If you know your substrate, know your extract, and dial in your sampling you will have good data to interpret. Happy growing!

Dirty Business Soil‘s retainer-based services facilitate improvement of farm practices through science-based-solutions, and data-driven decisions. Helping to increase production efficiency and optics by empowering the modern cannabis cultivator with effective tools to elevate their businesses into a successful future. To learn more, email [email protected] or visit dbsanalytics.com.